
Role Types Explained
Before you can enroll participants to your program, the role types must be defined to determine the view they have when they access the platform.
When setting up a role type there are a few settings to be configured.
Firstly, the Name, which is what administrators see when they are selecting the role to assign a participant to. The participants themselves will not see this.
Then, there is a field where you can enter the Briefing text for that role. This text will be visible to participants who are added to the role at the top of their home page and can therefore be used to introduce the program and explain what's required from them. This is optional, so if you do not enter any text then participants in this role will not have the briefing area visible on their home page.
The third and final setting for a role type is whether or not they will have a curriculum. It would usually be the case that only one role type would have a curriculum (e.g. the learner) and so the program capability 'Has a curriculum' would be selected as in the screenshot below.
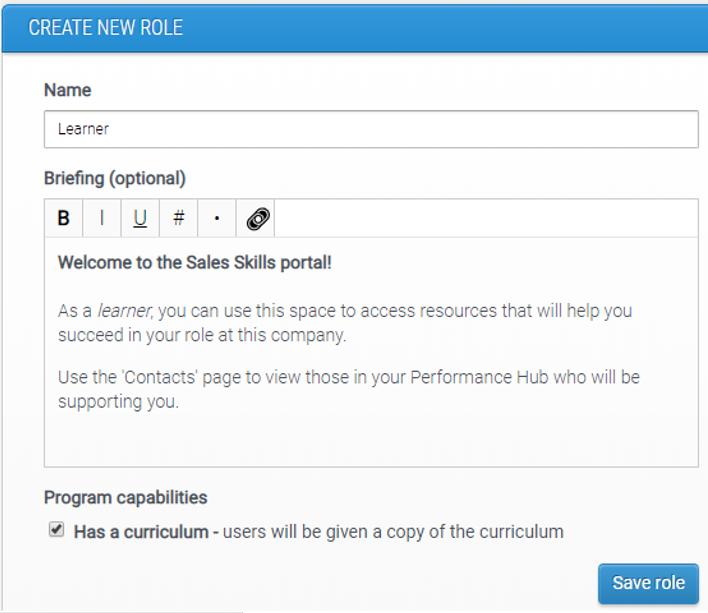
For the other role types (e.g. those supporting the learner), this checkbox would be left deselected.
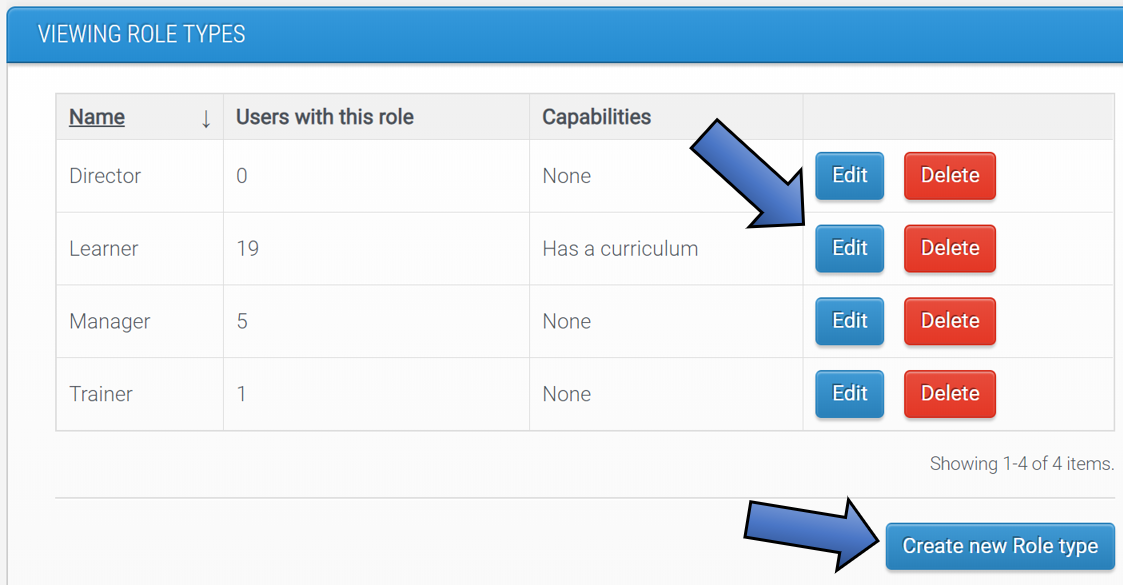
So, the screenshot below shows an example of four role types set up for a program.
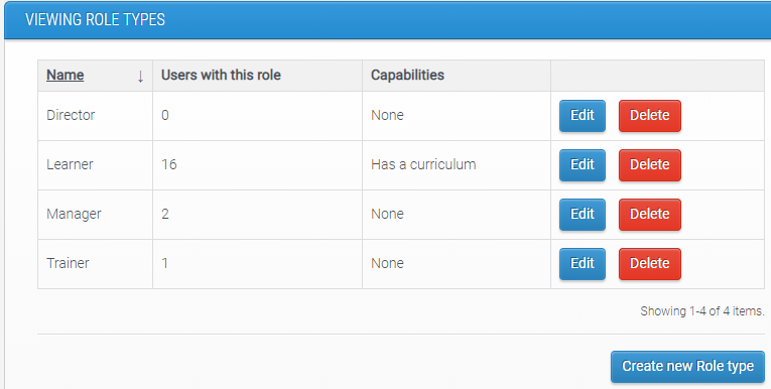
As explained earlier in this article, the three components of a role type are its name, briefing and the turning on/off of the curriculum. The above screenshot shows how the names are displayed to administrators to assist them with adding participants to them.
When a participant is added to this program into the 'Learner' role, when they log in they will have the briefing displayed at the top of their HOME page (if briefing text has been set or the role) and then on their left-hand navigation menu there will be a 'Program' page (if the role has been configured to 'have a curriculum').

How to Create Role Types
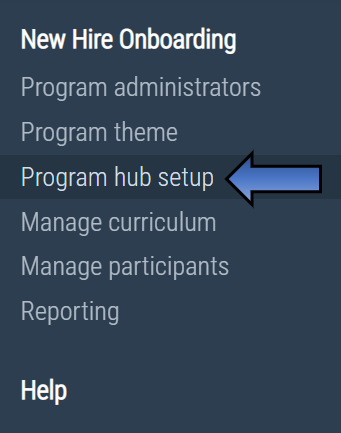
To create a role type, select 'Program hub setup' on the left-hand navigation menu on the administrator dashboard.
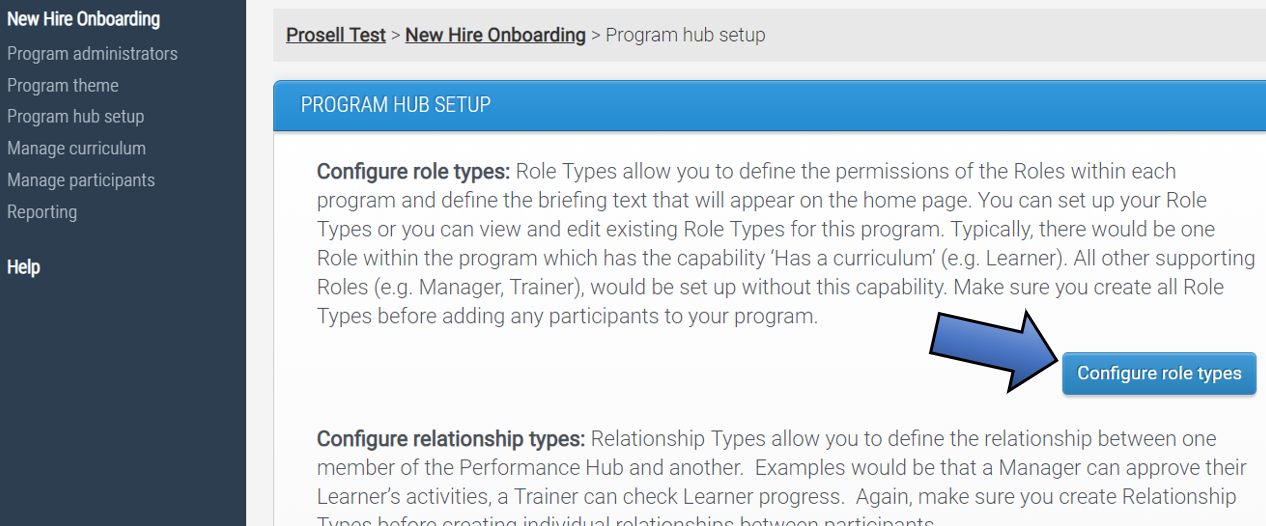
You'll be taken to a page where you can view or edit the existing role types if some have already been set up and also create new ones.
Once role types have been set up, and the program curriculum built, participants can be added into them. Click here to find out more about adding participants into roles.
Setting up corresponding relationship types
When a non-learner role type is created, a corresponding relationship type is often needed to define the link between participants. You can find out more about setting up relationship types in the next article.
If you created a role type that requires a corresponding relationship type, simply click the ‘Save role and add new relationship type’ button.
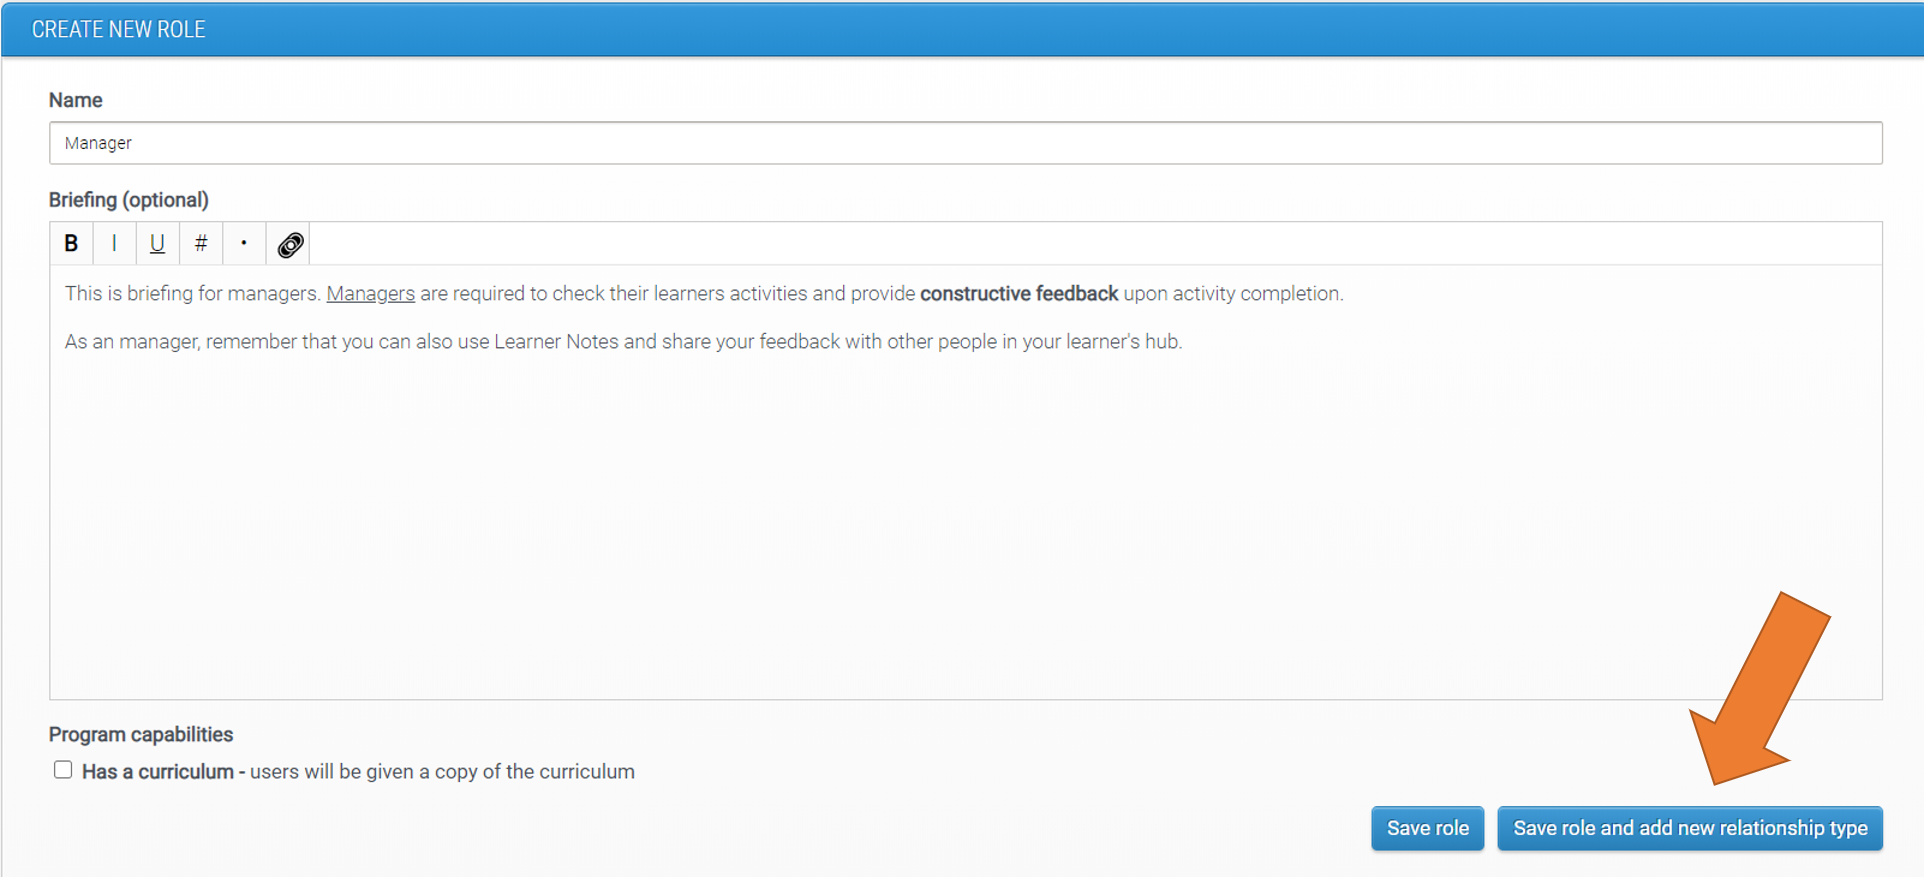
This will ensure that your role type is saved and you will also be taken to a page which allows you to set up the relationship type with the same (pre-populated) name and select relevant capabilities.
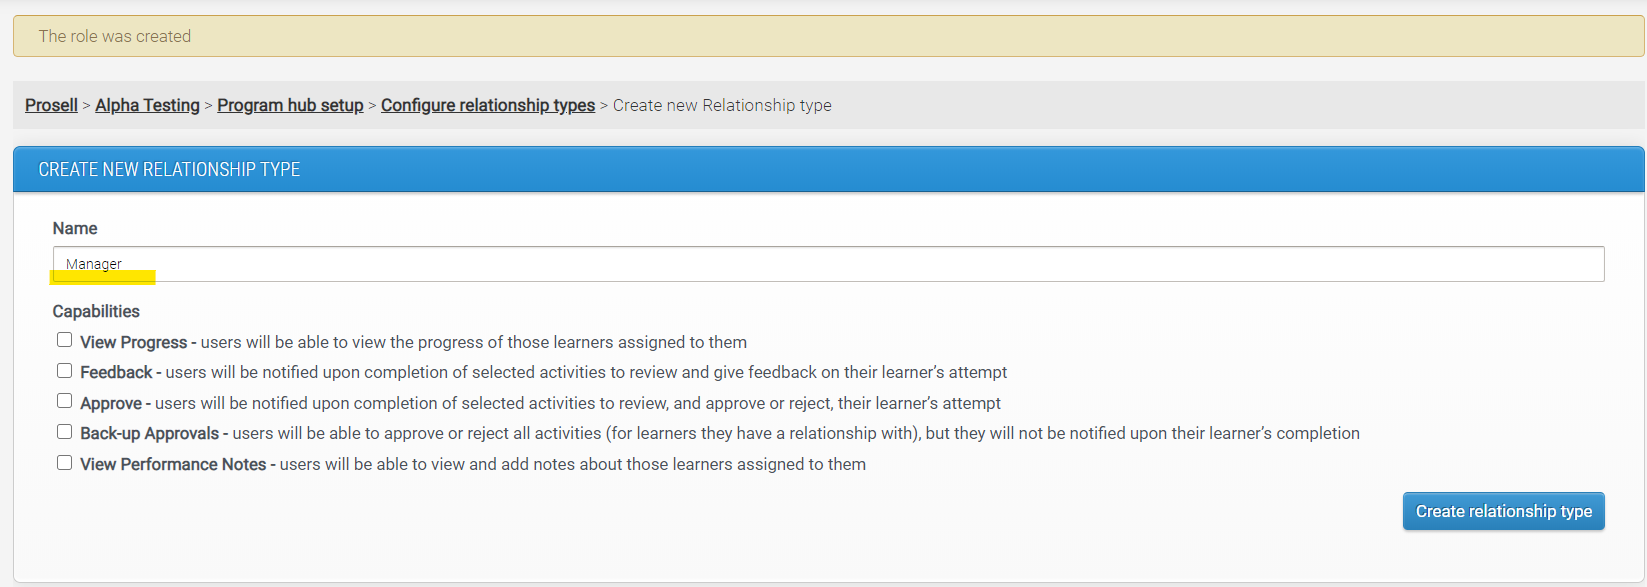
For differences in capabilities, please check our article for setting up relationship types.
Comments
0 comments
Please sign in to leave a comment.