
This article will outline the ways in which you can improve your activities through the options available in the toolbar of the Synopsis and Help Text. This includes the following:
- Inserting links
- Inserting images
- Embedding videos
- Changing text appearance (color, size, shadow)
- Inserting tables
We recommend focusing on getting your program structure and content completed first and then taking some time to experiment with these options to enhance the user experience.
Inserting links
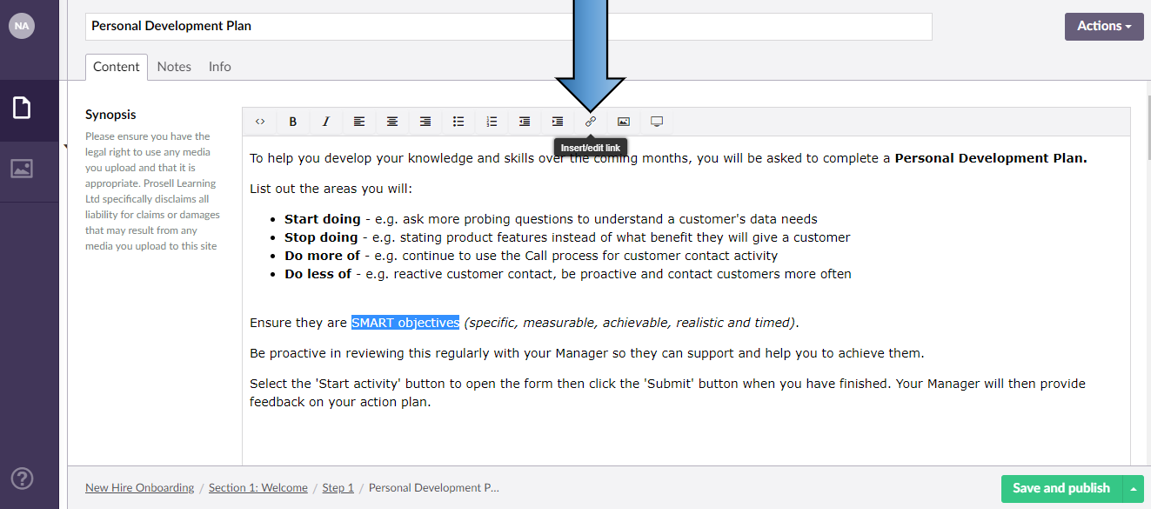
You can insert a hyperlink into the synopsis by highlighting the word, or words, you would like to be linked and then select the insert/edit link button on the synopsis toolbar.

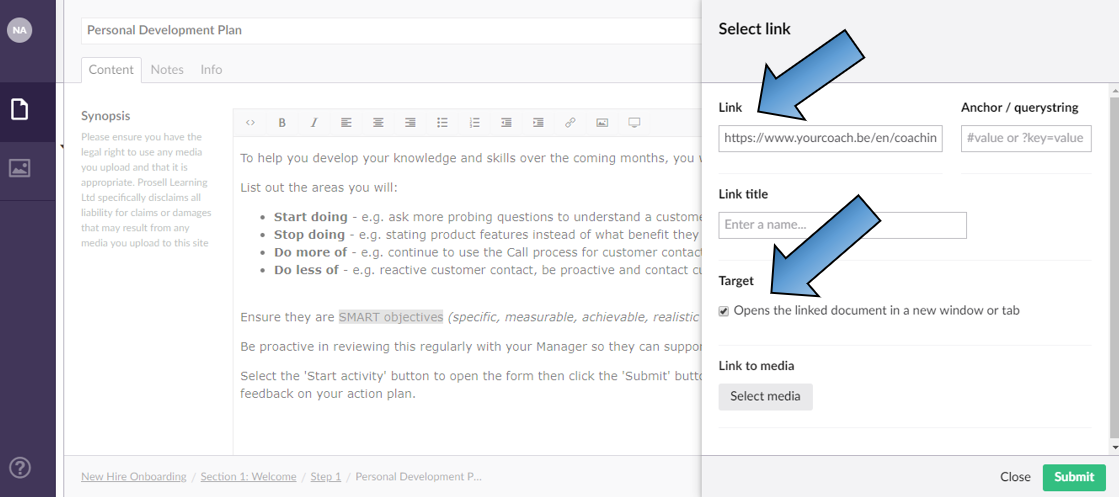
In the window that appears you will need to enter the URL link into the 'Link' field.
Also, beneath the 'Target' heading there is a checkbox for whether you would like the destination of this link to open in a new tab or to open within the same page. Please note that with the latter (checkbox unticked), when clicked on by the user it will re-direct them out of the platform and to the linked URL.
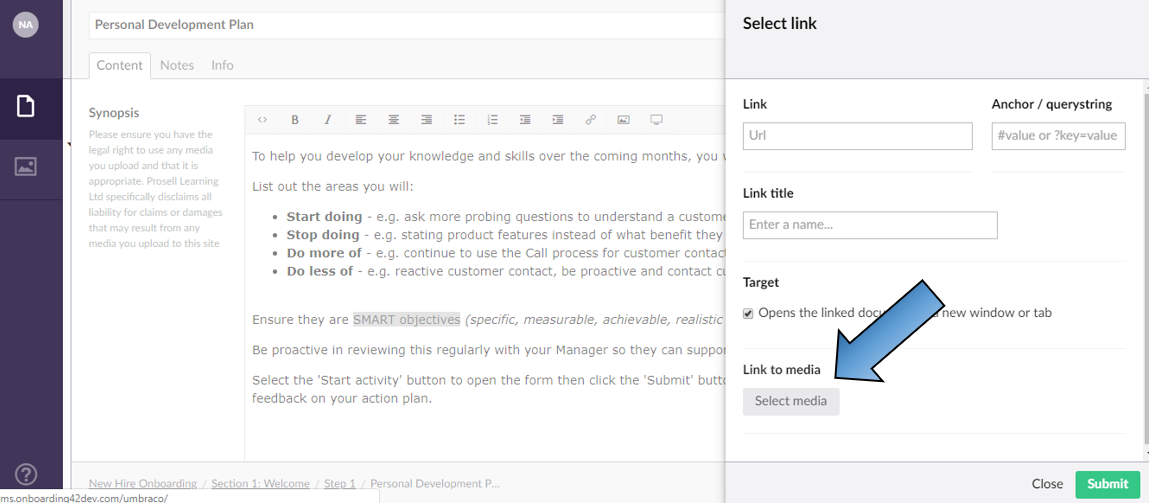
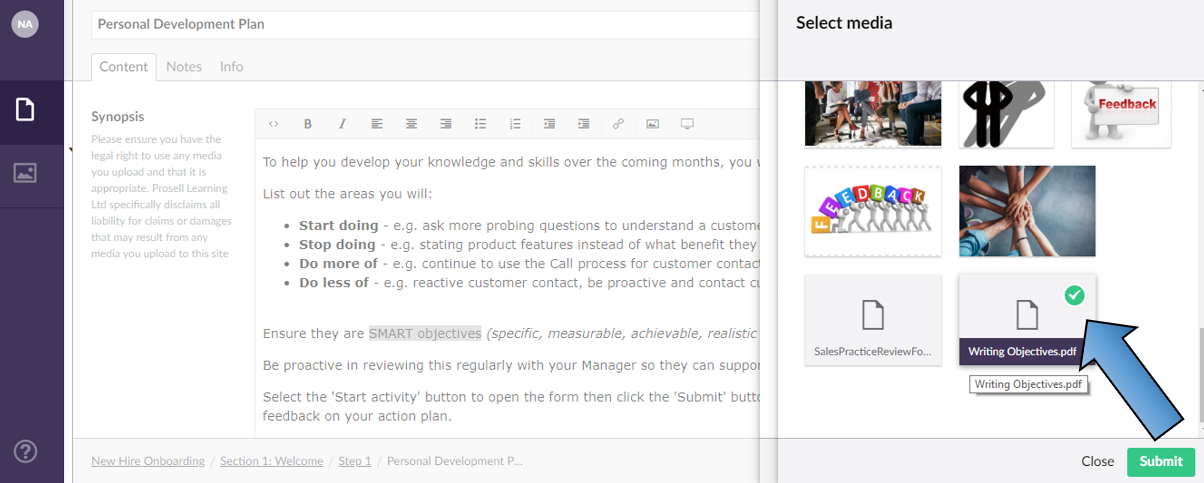
Alternatively, if you wanted to link to a file rather than a web page, then you would bypass the 'Link' Url field and go down to the 'Select media' button beneath 'Link to media'.
This will then load your media library (shared by all those under your account/licence), where you can either select an existing file from the library, or press the 'Upload' button to upload a new file. 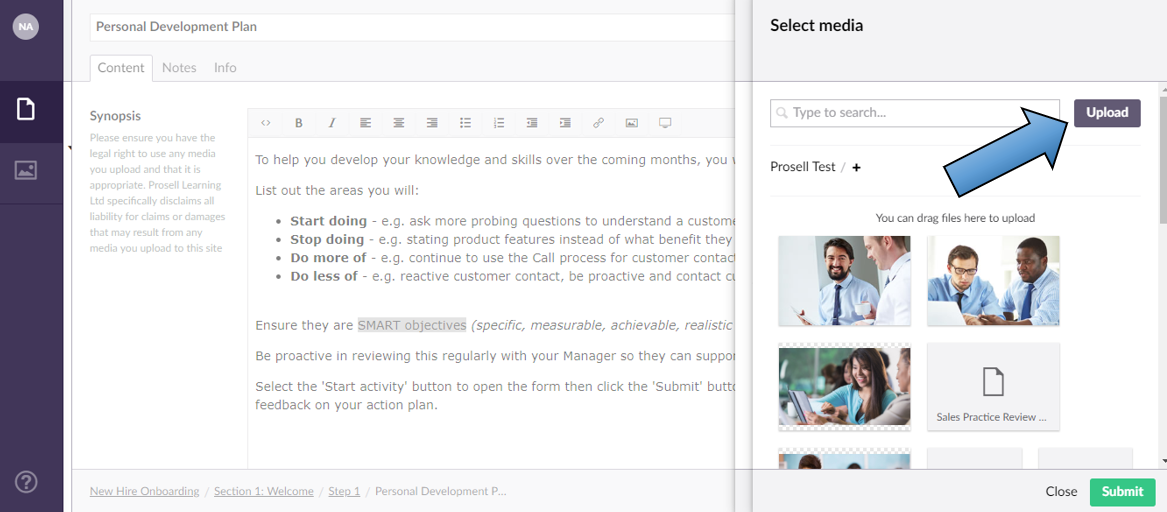
Make sure the file is selected (indicated by the green arrow) and then press 'Submit'.
Inserting images
The method of inserting images into the synopsis is similar to that outlined above for links, except it's done through the 'Media Picker' option on the toolbar.

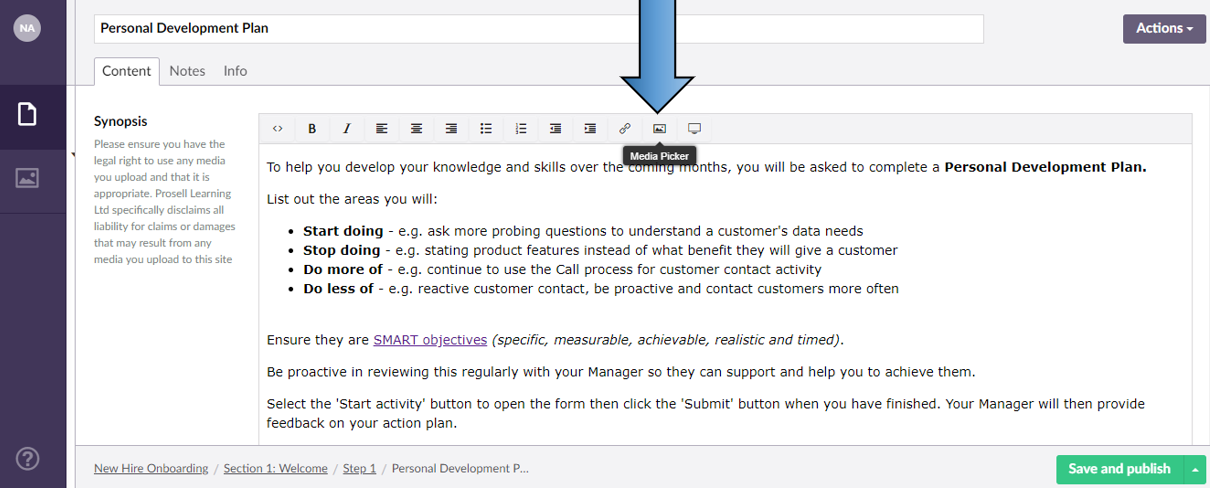
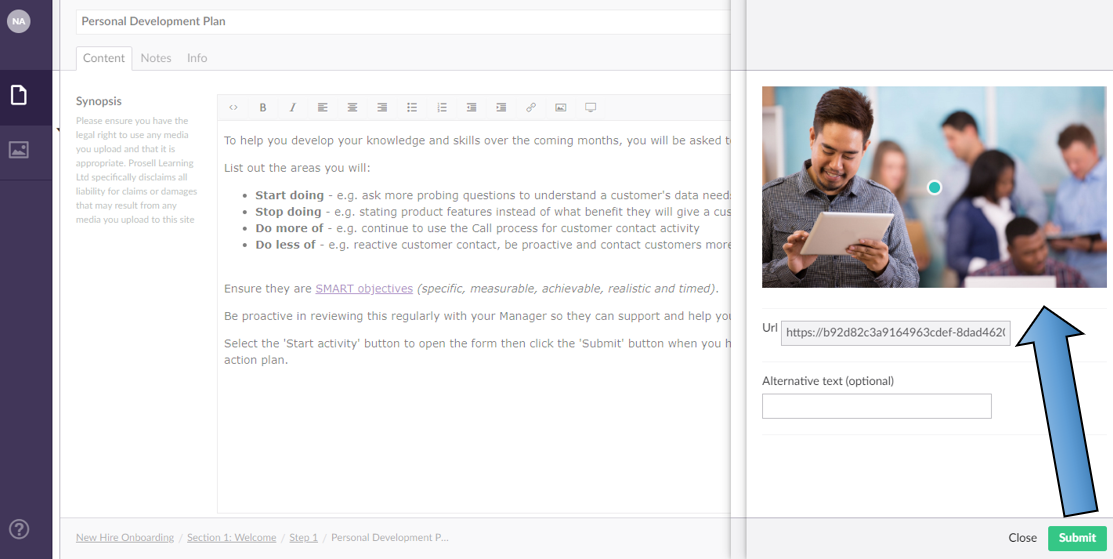
Select an image from the library or locate a new one from your device files through the 'Upload' button.
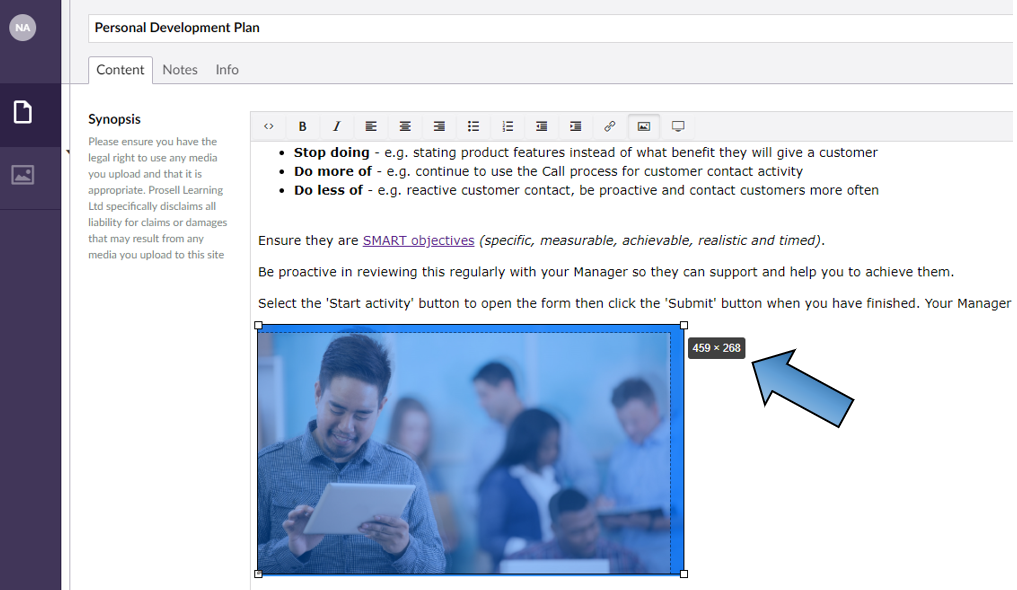
The selected image will then appear. Press 'Submit'.
Once it has inserted into the synopsis, you can drag the corners to re-size it.
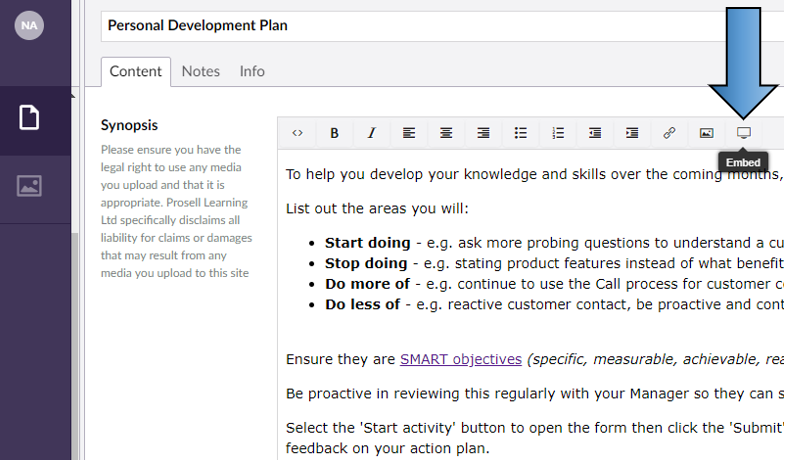
Embedding videos
Videos can be embedded within an activity synopsis if they are hosted on platforms such as Vimeo or YouTube. Select the 'Embed' option on the synopsis toolbar (the screen icon).

The Embed box will then appear where you can enter the URL for the video. Once the URL has been pasted in the box, clicking 'Retrieve' will open the video.

If a video has been found, it will appear below. Press 'Submit' to confirm.
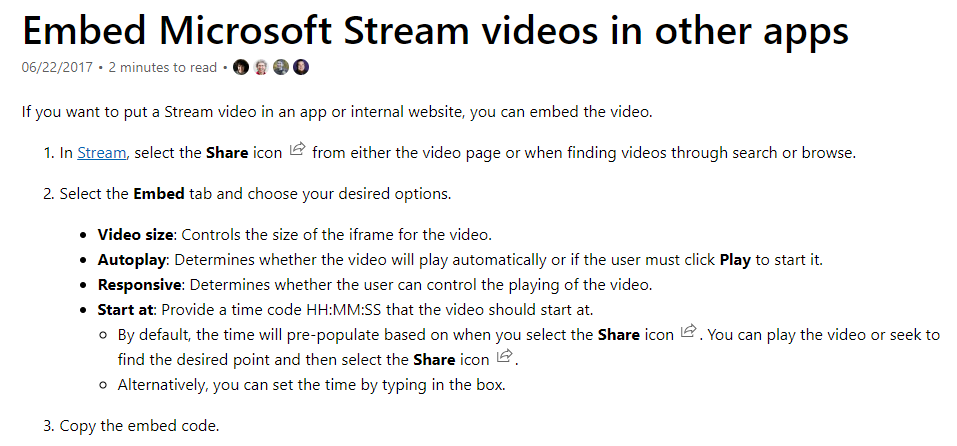
For some video hosting platforms this method of entering the URL to retrieve it will not work. Instead, the platform may provide an 'Embed' code.
An example of one of these platforms is Microsoft Stream, who provide the following steps for how to obtain their embed code...
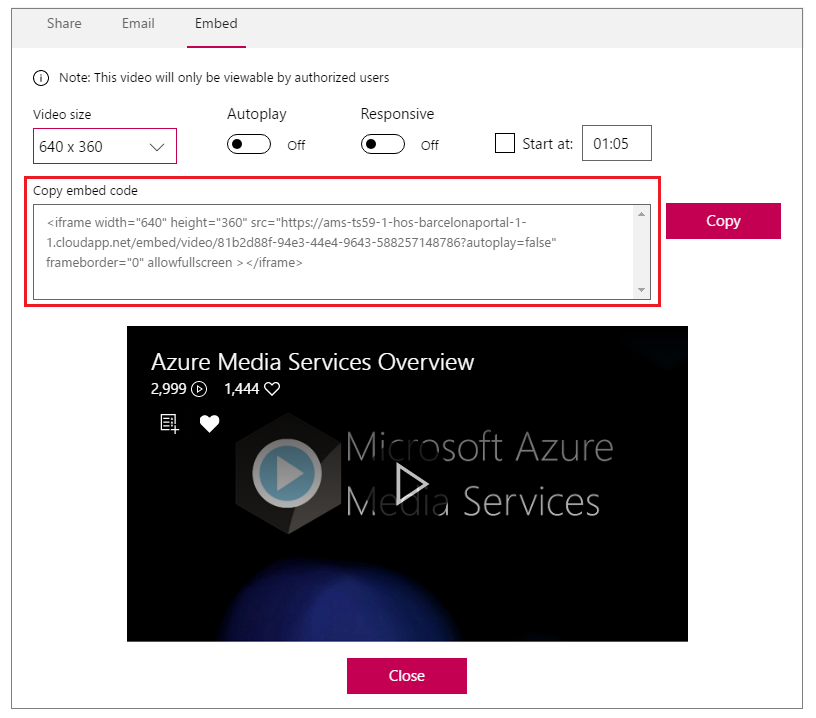
That brings us onto copying 'embed' codes into the synopsis through 'Source code'...
Using 'Source code'
HTML codes can be copied into the 'Source code' on a synopsis through its toolbar.
Don't worry, you don't have to be able to write code to do this! It's as simple as copying and pasting the examples provided below and then replacing the text and values as necessary. We will explain...

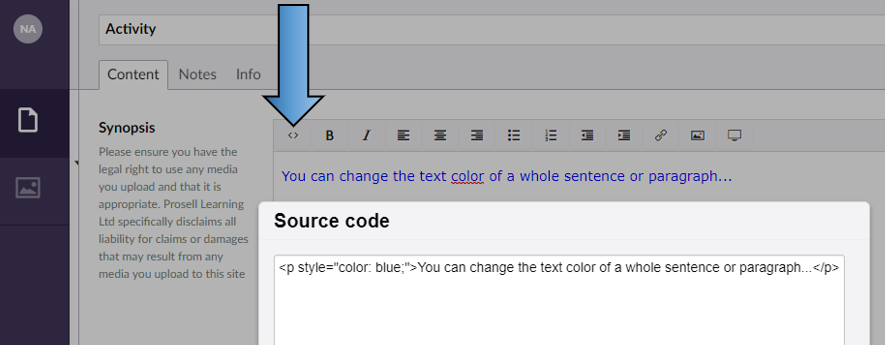
COLOR OF TEXT
<p style="color:blue;">You can change the text color of a whole sentence or paragraph...</p>
To change the color of text, just copy and paste the above line into the source code box and change the text within it.
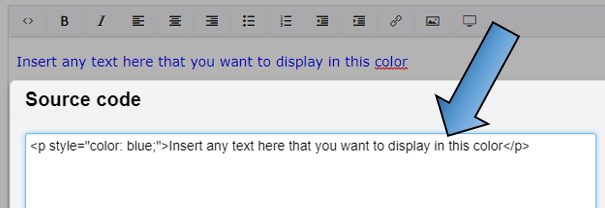
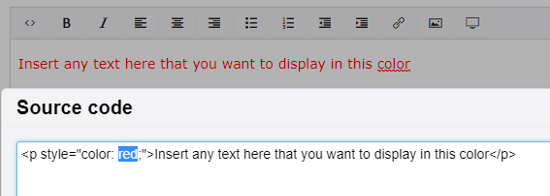
Then, at the beginning of the line you will see it reads "color: blue". Replace the word blue with the color of your choice.
If you want a specific color shade, then where the word of the color is you can replace this with the hex code of the color.
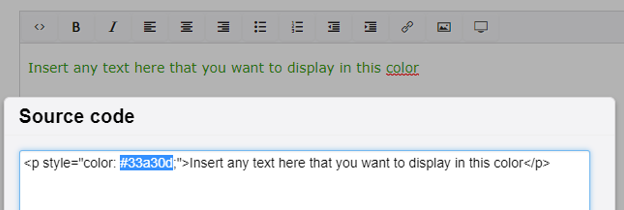
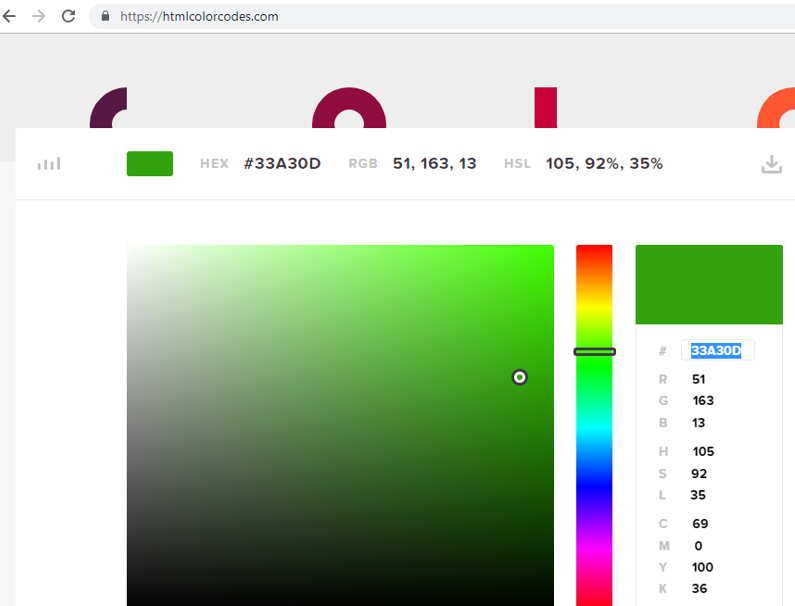
You can get a color's hex code from various websites, such as https://htmlcolorcodes.com. Just copy the hex code, including the hashtag (#) at the start), and paste it into the space after "color" in the source code.
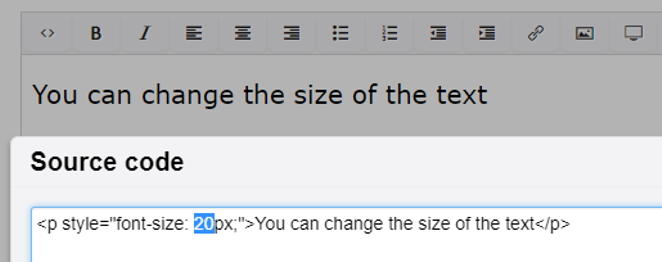
SIZE OF TEXT
<p style="font-size: 20px;">You can change the size of the text</p>
By copying and pasting the above into the source code of a synopsis, you can then change the text and the size number.
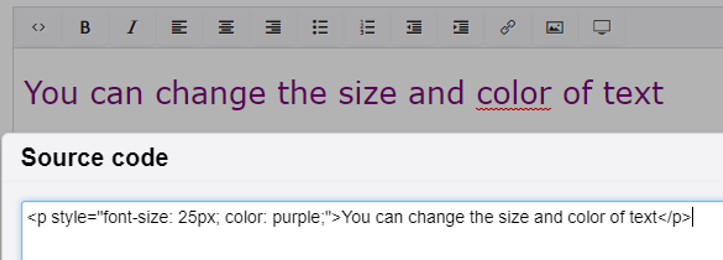
You can do both of the above (color and size)
INSERTING TABLES
Now, this one may look more complicated, but really it's just the same as the above where you're copying and pasting into the source code box and changing the text within it.
<table border="0">
<tbody>
<tr>
<th>Feature</th>
<th>Advantage</th>
<th>Benefit</th>
</tr>
<tr>
<td><strong>Add to timeline</strong></td>
<td>Admins do not have to build all content before launching with participants</td>
<td>Admins can manage their time more efficiently</td>
</tr>
<tr>
<td><strong>Activity repository</strong></td>
<td>Admins can share their best activities</td>
<td>Saves time as it prevents the same activity being build out twice</td>
</tr>
<tr>
<td><strong>In-built reporting</strong></td>
<td>Visibility of learner activity within a program</td>
<td>Admins can intervene if they notice that certain learners are not making progress</td>
</tr>
</tbody>
</table>
<p> </p>
<p> </p>
The screenshot below shows the code above copied into the source code box, and how this then shows as a table in the synopsis. Within this view (in the activity builder) the table looks plain, but this is not how it will appear in the front-end (a user's view).
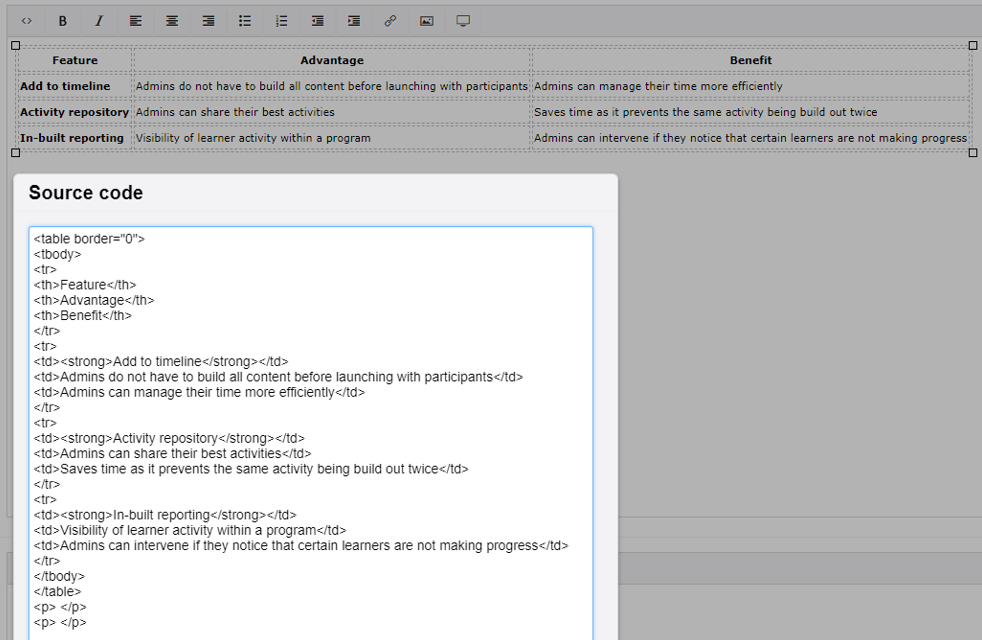
See here that the styling is consistent with the rest of the program. 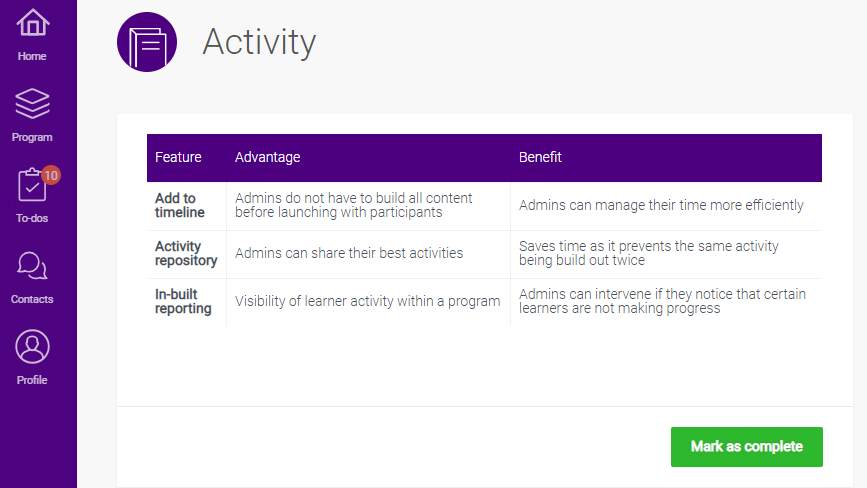
ADD HTML EMBED CODES TO INSERT ASSETS
Pretty much anything that gives you an embed code can be used within the synopsis by copying it into the 'Source code'.
Examples include: LinkedIn Slides, Google Forms, Google Maps, Microsoft Forms
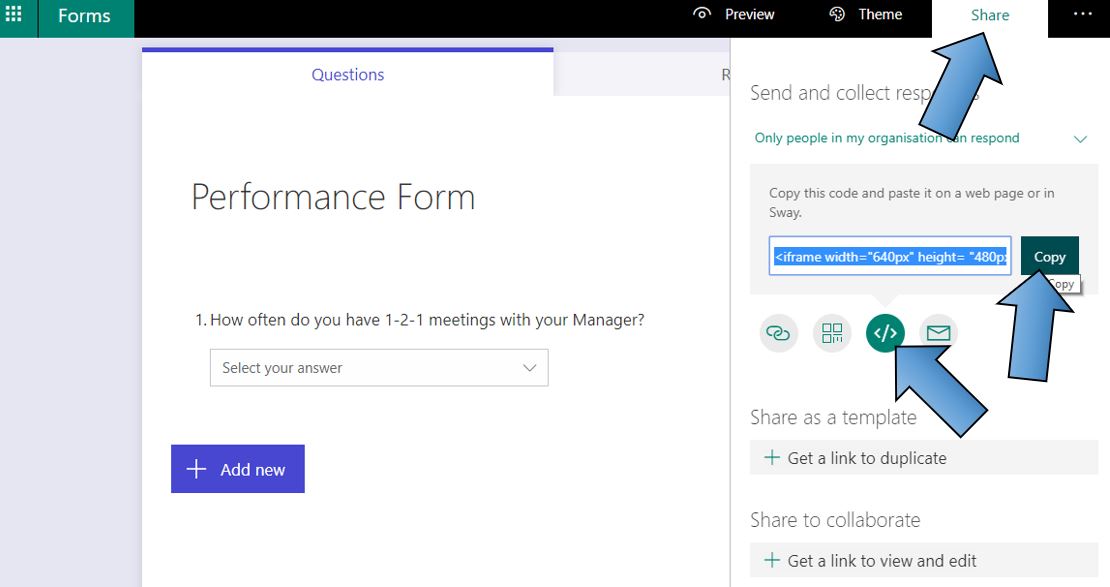
The embed code can usually be retrieved from an option to 'Share' and can be recognised by an icon showing </>. See an example of Microsoft Forms below.
To recap, HTML code is entered within the 'Source code' option on the synopsis toolbar - indicated by <>.
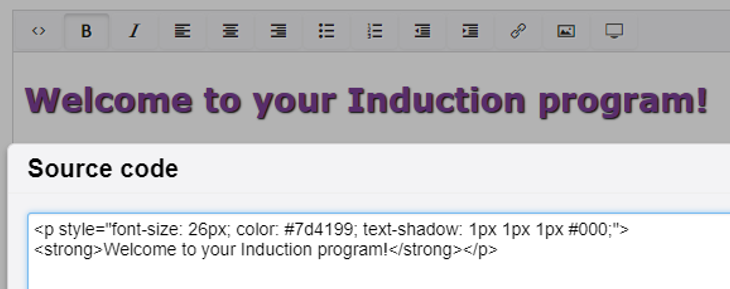
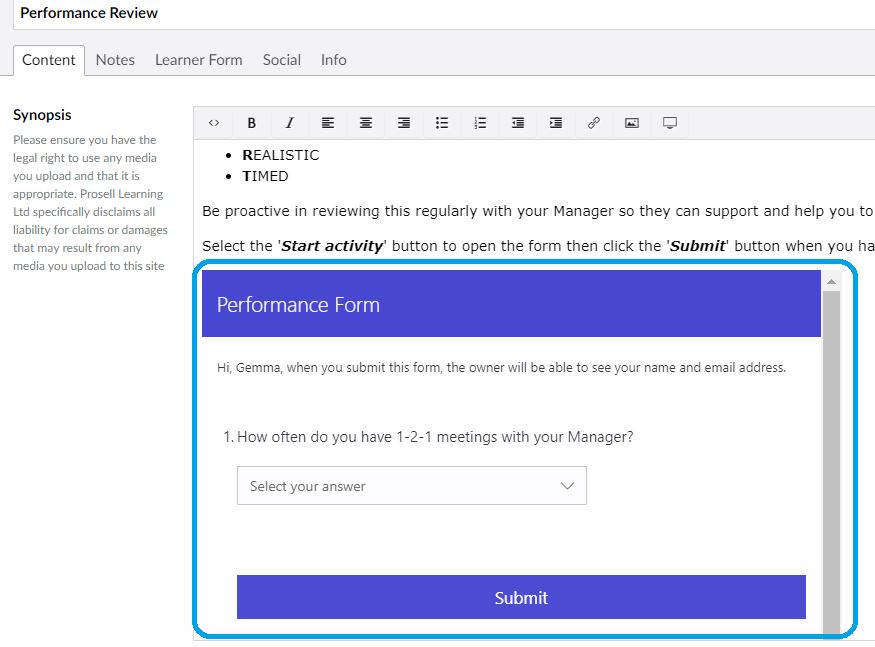
Paste the copied code in the position you want the asset to appear. In the screenshot below, you can see text that has already been entered in the synopsis and there is some code around this for a new paragraph (<p>) and to make text bold (<strong>). The circled paragraph that starts with 'iframe' is the Microsoft Forms embed code that has been copied and pasted.

After clicking 'ok' the source code box will close and you will see the Microsoft Forms iframe load into the synopsis. This would be the case for any asset you embed in the way, including videos.
Comments
0 comments
Please sign in to leave a comment.