
How do I set up a social activity and define the groups?
When creating or editing an activity as an administrator, you will often work in the ‘Content’ tab to define the core activity settings, with forms and quizzes having additional tabs to input their questions.
There is now an additional tab for ‘Social’ settings.
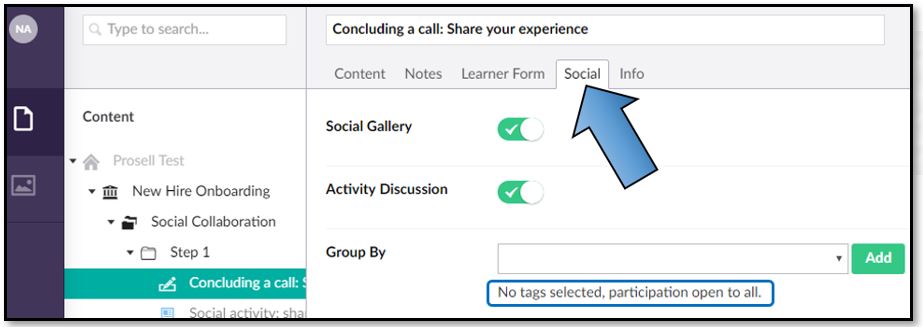
All activity types will have the option to enable the ‘Activity Discussion’, with form activities having an additional option of the ‘Social Gallery’.
The ‘Group By’ field is for determining the groups; i.e. which learners can see one another’s gallery entries and discussion posts. Leave this blank if you want the activity to be open to all learners in the program.
The group by dropdown box will be populated with the tag families that you have attached to participants in your program. Select the tag family and then click the ‘Add’ button to the right to confirm.
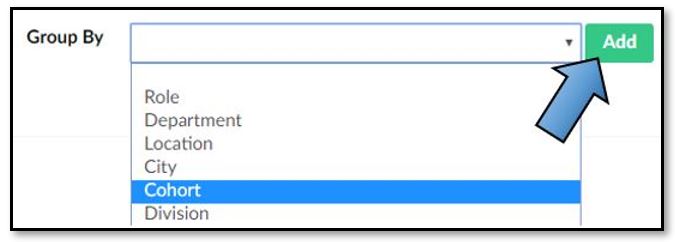
As an example, if you only select the tag family ‘Cohort’ then all learners with the tag ‘Cohort:May’ will be in the same group, whilst those with the tag ‘Cohort:June’ will be in a different group.
However, you can add multiple tag families to the criteria to narrow it down further.

In this example where the tag families ‘Cohort’ and ‘Division’ are selected, those with the tags ‘Cohort:May’ AND ‘Division:West’ will be in a different group to those with the tags ‘Cohort:May’ AND ‘Division:Central’, because even though their Cohort tags match their Division tags do not.
To explain this further, the screenshot below shows an example of a csv spreadsheet used to load participants into a program.
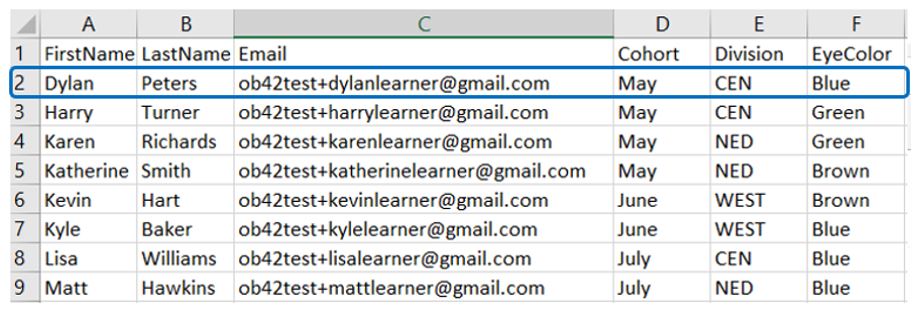
You may already be familiar with these, but the first three columns (FirstName, LastName and Email) are the minimum details needed by the platform to enrol a user. The following columns are tags, with the headings being the “tag family” that all users share, and then the tags themselves in the fields beneath them that can differ across participants.
Looking at the spreadsheet above, once this has been uploaded into the platform, the first participant, Dylan Peters, would be given the following three tags:
- Cohort:May
- Division:CEN
- EyeColor:Blue
So, using the example outlined previously where the tag family ‘Cohort’ is selected as the group identifier for a social activity, the groups would be:

However, if two tag families were selected for the grouping, such as ‘Cohort’ AND ‘Division’, then the social groups would be:

Tags can also be applied to existing participants using the multi-action tool. You can do this by:
1. Using the filters to bring up the participants you want to add tags to, then select all or some of them.
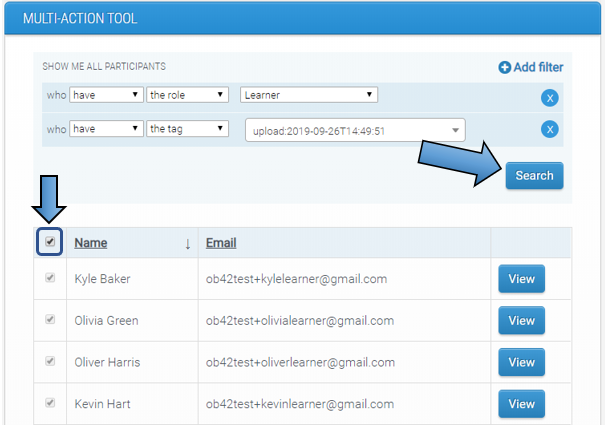
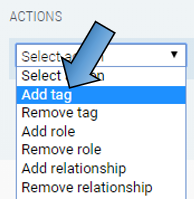
2. In the Actions drop-down box at the bottom of the page, select 'Add tag'.
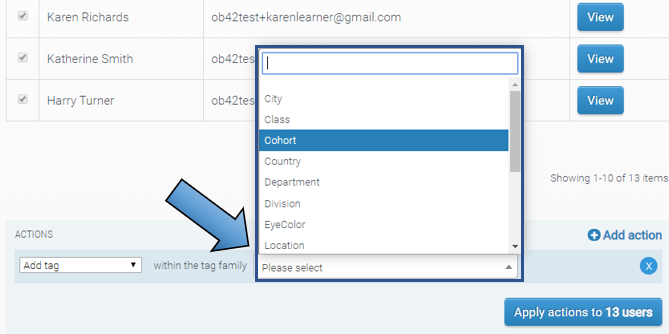
3. Then, in the first drop-down that appears you will need to select the Family for the tag (e.g. Cohort, Location, Class). The Tag Family is the part that is selected for a social activity to define its grouping.
4. The next drop-down is where you then select the tag within the family (e.g. May, London). Applying this action will give all selected participants the tag in the format 'TagFamily:Tag', e.g. 'Cohort:May'.

So, using this example, if 'Cohort' was the selected Tag Family for a social activity, then all learners with a matching 'Cohort' Tag would be in the same group and be able to see each other's posts. E.g. everyone with the tag 'Cohort:May' would be in the same group and everyone with the tag 'Cohort:June' would be in a different group.
Click here for more information on social activities and the learner experience.
Comments
0 comments
Please sign in to leave a comment.