
What is a Link activity type?
With the Link activity type, as an admin you can either upload a file that will download onto the participant's device (e.g. an excel spreadsheet) or link to an external website via a URL (e.g. your company website).
Completion of the activity is achieved by the learner pressing the action button on the synopsis page, which will either open/download the file that's been uploaded or open the web page that's been linked.
You may already be aware that files and URLs can be placed within all activities, regardless of its type, via alternative methods (either through Related Documents or hyperlinked in synopsis text). However, with these methods there is no way of tracking whether the participants accessed them.
The benefit of using a Link activity is that when the file has been downloaded or web page has been visited by the learner, the activity is marked as complete so you can track this.
So, if you want to know whether or not your learner opened a particular file or visited a particular web page then you should include it as a Link activity.
How to create a link activity
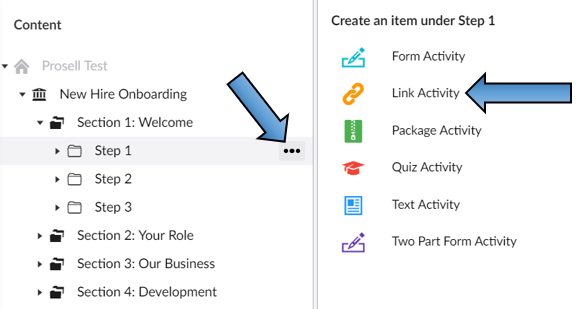
Create an activity within a step and select 'Link' when you are presented with the list of types to choose from.
Within the 'Content' tab for the new activity, you will find the common fields that all activity types share (e.g. synopsis, thumbnail and icon). However, there will be a 'Link' field which is only included in this type.
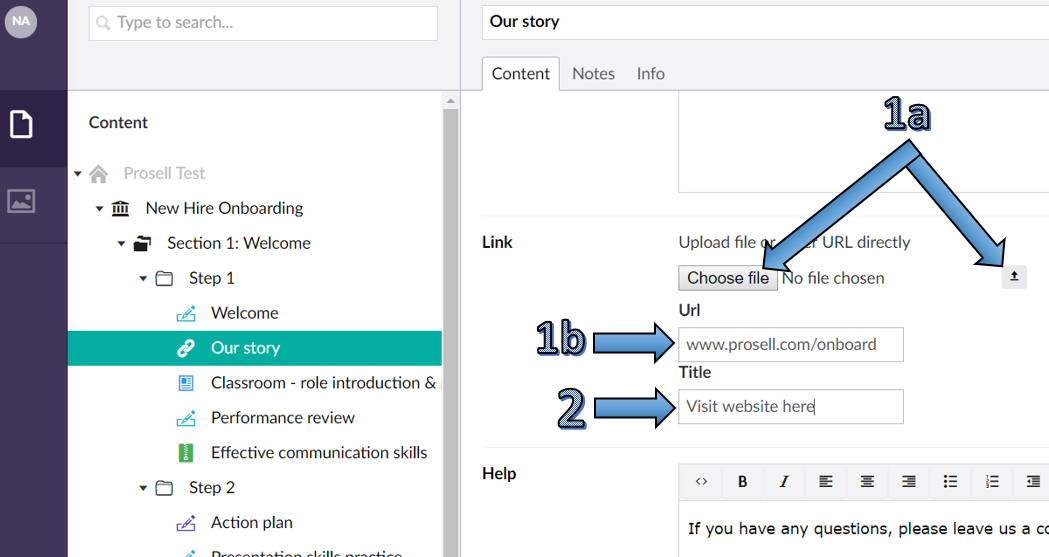
As mentioned at the start of this article, there are two methods of linking: to a file or a web page URL...
To upload a file, locate it from your computer by selecting 'Choose file' button and, once done, click the small upward-facing arrow immediately to its right (marked 1a in the screenshot above).
To link to a website, simply enter its URL into the 'Url' field (Marked 1b in the screenshot below).
Once you have either uploaded the file or entered the URL, you can customize what the button will be labelled to participants (for Text activities this is labelled "Mark as complete" and for Form and Quiz activities it's "Start activity'). This step is marked 2 in the screenshot above.
Don't forget to Save and publish in the usual way as you're creating or editing activities.
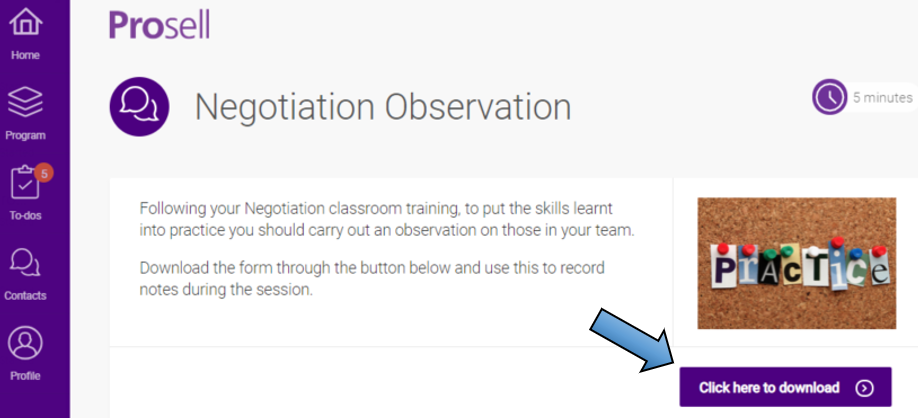
How link activities appear to a front-end user
When a link activity is opened, it first lands on the overview screen (as is the same for all activity types). On this screen is the synopsis, of which the purpose is to give the learner an overview of the activity and what is required to complete it. In the case of a link activity, it could inform them what the purpose of the file or website is and what they should do with it (e.g. print and fill out the PDF or read a specific section of the website).
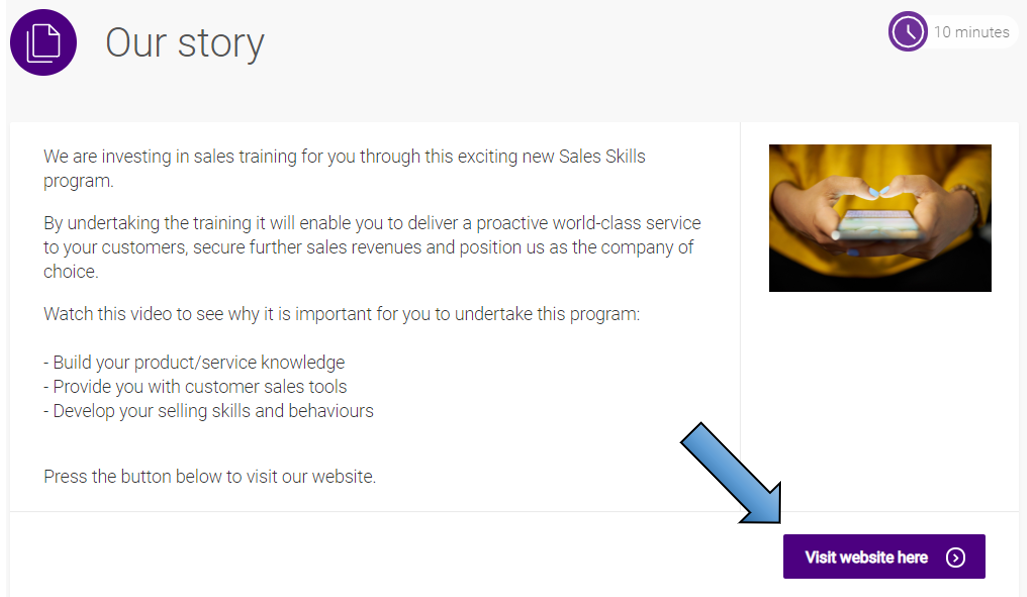
Beneath the synopsis there is a button to access the link/file. The button will show the label that the administrator who created the activity set.
If the link is a web page or a PDF file, then this will open in another tab on their browser (or a new window depending on your browser settings). In the example below, the link was to the On.Board website.

Once the learner has completed their task, they are able to go back to the On.Board tab where the activity's status will now be 'Finished' as the platform has tracked them visiting the link.
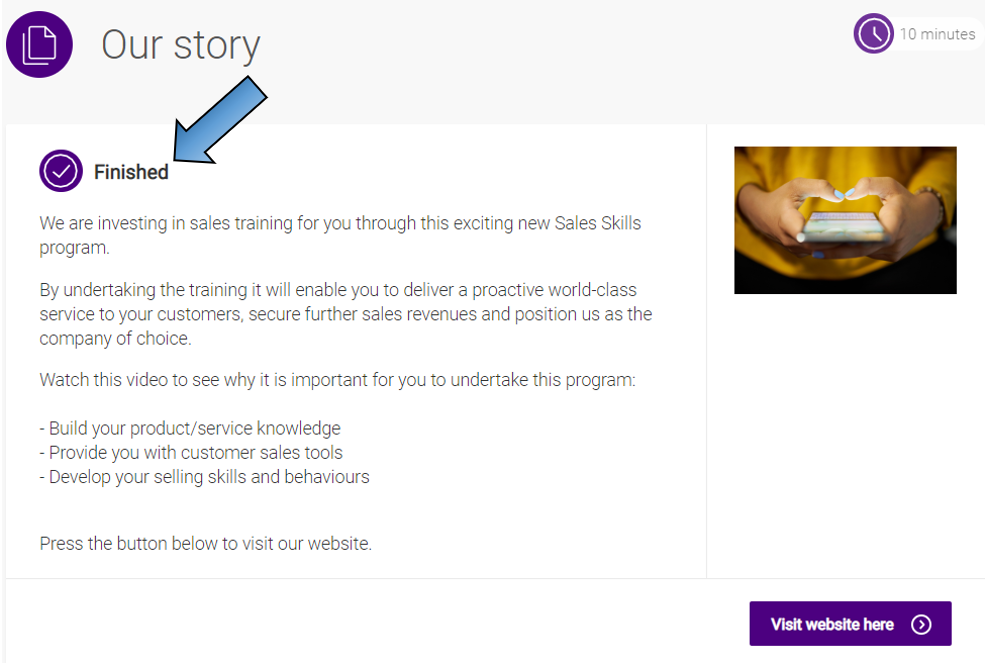
The only time this wouldn't be the case is if the activity is set to require approval - this status would then read 'Waiting for approval'.
If the link is to a file, such as a Word document or Powerpoint slides, then it will download to their device.
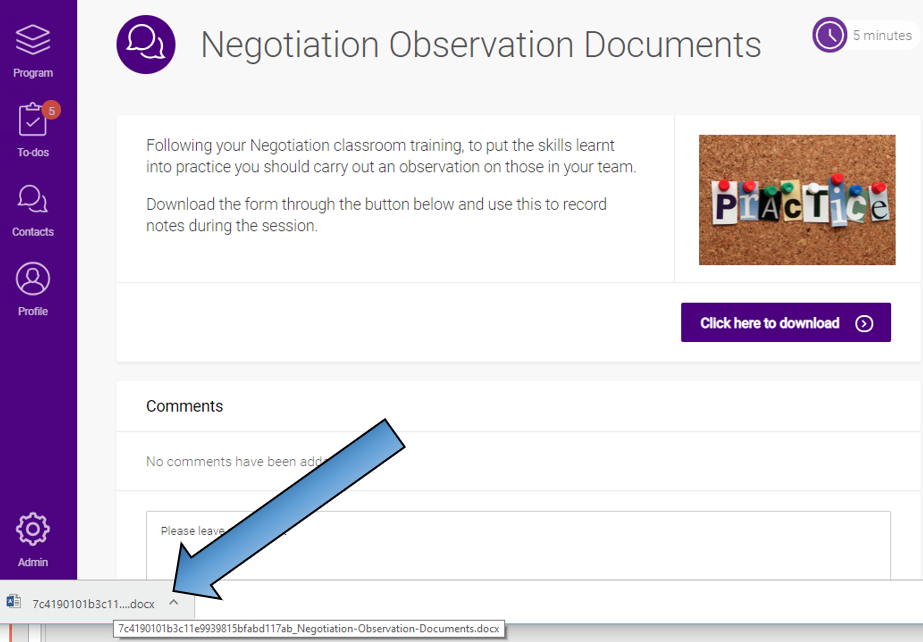
What file formats can be uploaded
Strictly, the answer is "Anything the end-user's machine can cope with".
Web browsers can open most kinds of file but please remember the above limitation, particularly when you are delivering to tablets and smartphones, which may not be able to make sense of every attachment type.
Comments
0 comments
Please sign in to leave a comment.